Tapes and Tape Drives
I had intended to wait until I’d found the proper 9-track tape drive for the system before attempting to go through the installation process. As you might recall, the Qualstar drive I have on the system is functional but extremely slow; it takes several minutes to find and load tiny diagnostic programs from tape. As system installation requires copying 20-30 megabytes from tape (i.e. a lot of data), it seemed to me that doing an installation from the Qualstar would simply take too long to be practical.But on the other hand, the drive was functional and it occurred to me that possibly it was just the SDU “tar” utility’s simplicity that might be causing the extremely slow transfer rate: if it was overly conservative in its reads from tape, on an unbuffered drive like the Qualstar it might end up being very inefficient. Maybe the “load” tool would be a bit more intelligent in its tape handling. Or perhaps not — but there’s no harm in trying, right? And while I’d tracked down a proper Cipher F880 tape drive, it would require waiting until the current quarantine was lifted to go and pick it up. I demanded instant gratification so off I went. Except…
 |
| Shiny new 9-track tapes! Ok, they’re still twenty years old. That’s pretty new! |
The other pressing issue was one of tapes. I have a small pile of blank (or otherwise unimportant) 9-track tapes here at home but all of them were showing signs of shedding and none of them worked well enough for me to write out a complete Lambda Install tape. Despite a few cleaning passes, eventually enough oxide would shed off the tape to gum up the heads and cause errors. Clearly I would need to find some better tapes, so I hit up eBay and found a stack of 5 tapes, new-old stock (apparently from NASA). And waited patiently for them to arrive.
[About a week passes…]
[About a week passes…]
The Actual Installation
With new tapes in hand I was finally able to write out the “Install” tape without errors. And thus, with my fingers crossed and a rabbit’s foot in my pocket I started the installation process. The “load” utility is used to set up new hard disks and can copy files to and from tape to do installation and maintenance tasks. Here’s a transcription of the operation:SDU Monitor version 102 >> disksetup What kind of disk do you have? Select one of { eagle cdc-515 t-302 micro-169 cdc-9766 }: micro-169 >> /tar/load using 220K in slot 9 load version 307 (creating block-22 mini-label) (creating mini-label) Disk is micro-169 Loading "/tar/bigtape" Loading "/tar/st2181" Disk unit 0 needs to be initialized: Disk has no label, or mini-label is wrong. Create new unit 0 label from scratch? (y/n) y Creating lisp label from scratch. How many LAMBDA processors: 1 Type "?" for command list. load >
The initial steps above tell the SDU that I have a “micro-169″ disk (the 8-inch equivalent of the giant 14” Fujitsu I actually have installed). This is necessary to allow the load program to know the characteristics of the system’s disk. /tar/load is then executed and since it finds an empty disk, it sets up the disk’s label, the LMI’s equivalent of a partition table — information written to the beginning of the disk that describes the disk and slices the its space into partitions that can be used to hold files or entire filesystems. Even though this Lambda is a “2X2” system (with two LAMBDA processors) it would be a tight squeeze to run both of them in the the 160mb capacity of the drive, so for now I will only be running one of the two processors. Or trying to, anyway. (Oooh, foreshadowing!)
Continuing on:
load > install

*****************************************************
The new backup label track number is 16340.
Record this number and keep it with the machine.
*****************************************************
Writing unit 0 label
Using half-inch tape
Installing track-0 disk driver ...
copying 10 blocks from "/tar/disk" to "disk"
copy done

Tape-ID = "FRED gm 7/23/86 12:33:34 522520414 "
File is "SDU5 3.0 rev 14"; 1500 blocks.
"SDU5 3.0 rev 14" wants to be loaded into UNX6.
reading 1500 blocks into UNX6.
copying 1500 blocks from "bigtape" to "UNX6"
copy done

Next file ...

File is "ULAMBDA 1764"; 204 blocks.
Default partition to load into is LMC3
reading 204 blocks into LMC3.
copying 204 blocks from "bigtape" to "LMC3"
copy done

Next file ...

File is " 500.0 (12/8)"; 23189 blocks.
Default partition to load into is LOD1
reading 23189 blocks into LOD1.
copying 23189 blocks from "bigtape" to "LOD1"
copy done
Next file ...

End of tape.
Writing unit 0 label
load >
There are three tape files that the install process brings in; you can see them being copied above. The first (“SDU5 3.0 rev 14”) contains a set of tools for the SDU to use, diagnostics and bootstrap programs. The second (“ULAMBDA 1764″) contains a set of microcode files for use by the Lambda processor. The Lambda CPU is microcoded, and the SDU must load the proper microcode into the processor before it can run. The final file (cryptically named ” 500.0 (12/8)” is a load band. (The Symbolics analogue is a “world” file). This is (roughly) a snapshot of a running Lisp system’s virtual memory. At boot time, the load band is copied to the system’s paging partition, and memory-resident portions are paged into the Lambda’s memory and executed to bring the Lisp system to life.
As suspected the tape drive’s throughput was higher during installation than during diagnostic load. But not by much. The above process took about two hours and as you can see it completed without errors, or much fanfare. But it did complete!
Time now for the culmination of the last month’s time and effort: will it actually boot into Lisp? Nervously, I walk over to the LMI’s console, power it on, and issue the newboot command:
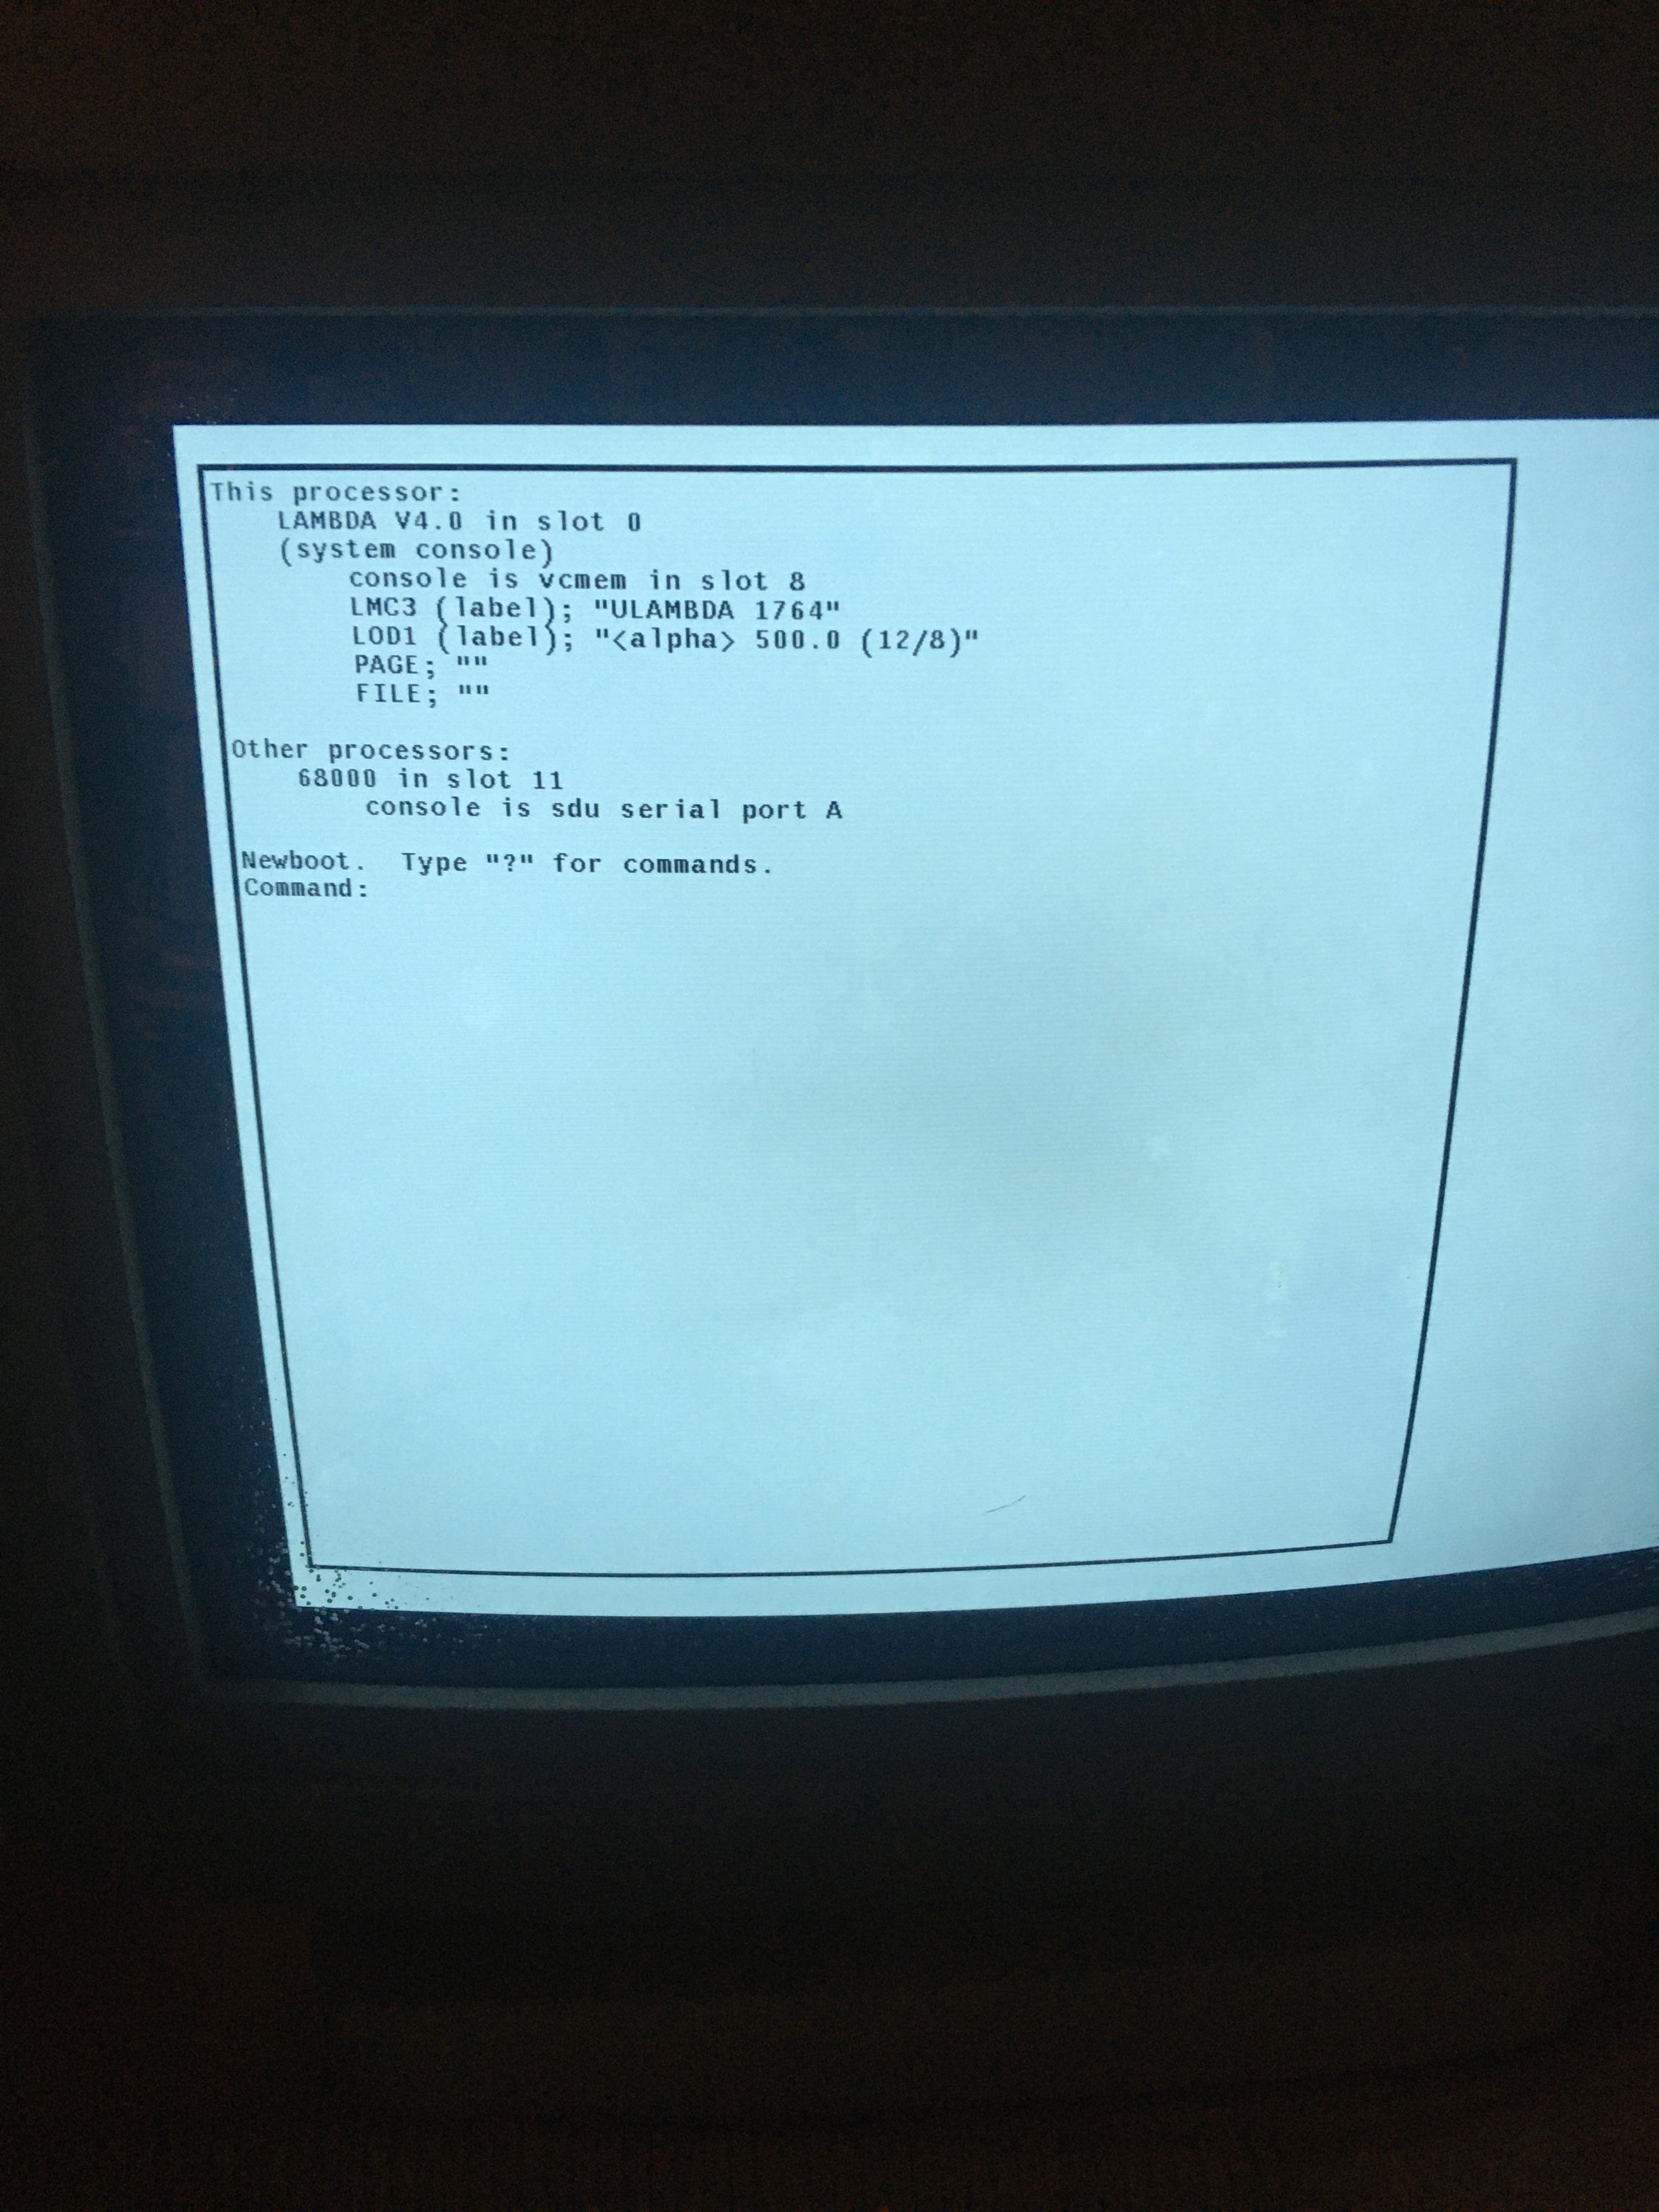 |
| The “newboot” herald, inviting me to continue… |
Newboot loaded right up and prompted me for a command. To start the system, all you need to do is type boot. And so I did, and away it went, loading boot microcode from disk and executing it, to bring the Lisp system in from the load band. Then the breaker tripped. Yes, I’m still running this all off a standard 15A circuit in my basement, and the addition of the Fujitsu drive has pushed it to its limit. Don’t do this at home, people.
I unplugged the tape drive to reduce the power load a bit, reset the breaker and turned the Lambda on again. Let’s have us another go, shall we?
(I apologize in advance for the poor quality of the videos that follow. One of the side-effects of being stuck at home is that all I have is a cellphone camera…)
(Warning, the above video is long, and also my phone gave out after 3:12. Just watch the first 30 seconds or so and you’ll get the gist of it.)
Long story short: about two minutes after the video above ended, the screen cleared. This normally indicates that Lisp is starting up, and is a good sign. And then… nothing. And more nothing. No disk activity. I gave it another couple of minutes, and then I pinged my friend Daniel Seagraves, the LMI expert. He told me to press “META-CTRL-META-CTRL-LINE” on the keyboard (that’s the META and CTRL keys on both the left and right side of the keyboard, and the LINE key, all held down at once). This returns control to the SDU and to newboot; at this point the “why” command will attempt to provide context detailing what’s going on with the Lambda CPU:
Long story short: about two minutes after the video above ended, the screen cleared. This normally indicates that Lisp is starting up, and is a good sign. And then… nothing. And more nothing. No disk activity. I gave it another couple of minutes, and then I pinged my friend Daniel Seagraves, the LMI expert. He told me to press “META-CTRL-META-CTRL-LINE” on the keyboard (that’s the META and CTRL keys on both the left and right side of the keyboard, and the LINE key, all held down at once). This returns control to the SDU and to newboot; at this point the “why” command will attempt to provide context detailing what’s going on with the Lambda CPU:
 |
Tell me why, I gotta know why! |
Since Daniel knows the system inside and out, he was able to determine exactly where things were going off the rails during Lisp startup. The error being reported indicated that a primitive operator expected an integer as an operand and was getting some other type. This hints at a problem inside the CPU logic, that either ended up loading a bogus operand, or that reported a valid operand as having a bogus type.
Out of superstition, I tried rebooting the system to see if anything changed but it failed identically, with exactly the same trace information from “why.”
In the absence of working diagnostics, schematics, or even detailed hardware information, debugging this problem was going to be an interesting endeavor.
But all was not lost. This is a 2×2 system, after all. There’s a second set of CPU boards in the chassis just waiting to be tested…
This time, after the screen clears (where the video above starts) you can see the “run lights” flashing at the bottom of the screen. (These tiny indicators reflect system and CPU activity while the system is running). Then the status line at the bottom loaded in and I almost fell over from shock. Holy cow, this thing is actually working after all this time!
I have one working Lambda CPU out of the two. I’m hoping that someday soon I can devise a plan for debugging the faulty processor. In particular, I think the missing “double-double” TRAM file opined about in Part 6 of this series has turned up on one of the moldy 9-track tapes I rescued from the Pennsylvania garage — this should hopefully allow me to run the Lambda CPU diagnostics, but it will have to wait until I have a larger disk to play with, as this file resides in a UNIX partition that I don’t currently have space for.
In the meantime since I have a known working set of CPU boards (recall from Part 2 that the Lambda processor consists of four boards), it was a simple matter to isolate the fault to a single board by swapping boards between the sets one at a time. The issue turns out to be somewhere on the CM (“Control Memory”) board in CPU 0.
Meanwhile, not everything is exactly rosy with CPU 1… what’s with the system clock?
System beeps are high-pitched squeaks and the wall clock on the status line counts about 4x faster than it should. Daniel and I are unsure exactly what the cause is at this time, but we narrowed it down to the RG (“ReGisters”) board. In many systems there is a periodic timer, sometimes derived from the AC line frequency (60Hz in the US) that is used to keep time and run the operating system’s process scheduler. The LMI uses something similar, and clearly it is malfunctioning.
Another fairly major issue is the lack of a working mouse. Way back in Part 2 I noted that the RJ11 connector had corroded into a green blob. This still needs repair and as it turns out, getting a working mouse on this system ended up being a journey all its own…
But that’s for my next installment. Until then, keep on keepin’ on!
 |
| Lookin’ good, LMI. Lookin’ good. |
No comments:
Post a Comment